My sewing area/sweatshop
is consistent with my quilt creation style---an ongoing work in progress.
When
I first set foot in this house and walked into what was then a stained glass
studio, I was beside myself. The wheels in my head spun into overdrive! I had
just started quilting. If we bought this house, I wouldn’t have to sew on the
dining room table, I could leave my sewing machine set up permanently!
There
would be room for fabric! The counters were built-in in a U shape, with
drawers. There was even a built in light
table! And, the area was far away from the bedrooms. I could sew late into the
night without waking up the whole house.
We
bought the house and I started filling my sewing area with quilting books, tools,
and mountains of fabric. It wasn’t long before it was obvious that I had to get
a handle on organization or risk getting buried under an avalanche of fabric.
I took measurements and fit
three-drawer bins under the counters to hold fabric. I followed advice from the
book Organizing Solutions for Every
Quilter and wrapped my fabric around my 6 x 24” ruler so that it would all
be uniformly folded.

Then I loaded the
drawers mostly by color and a few other separate categories (like Christmas
fabric, fall prints, 30s/40s reproductions, novelty fabrics and batiks). It’s
good that the plastic drawers are semi- transparent because then I can see the
colors in each one.
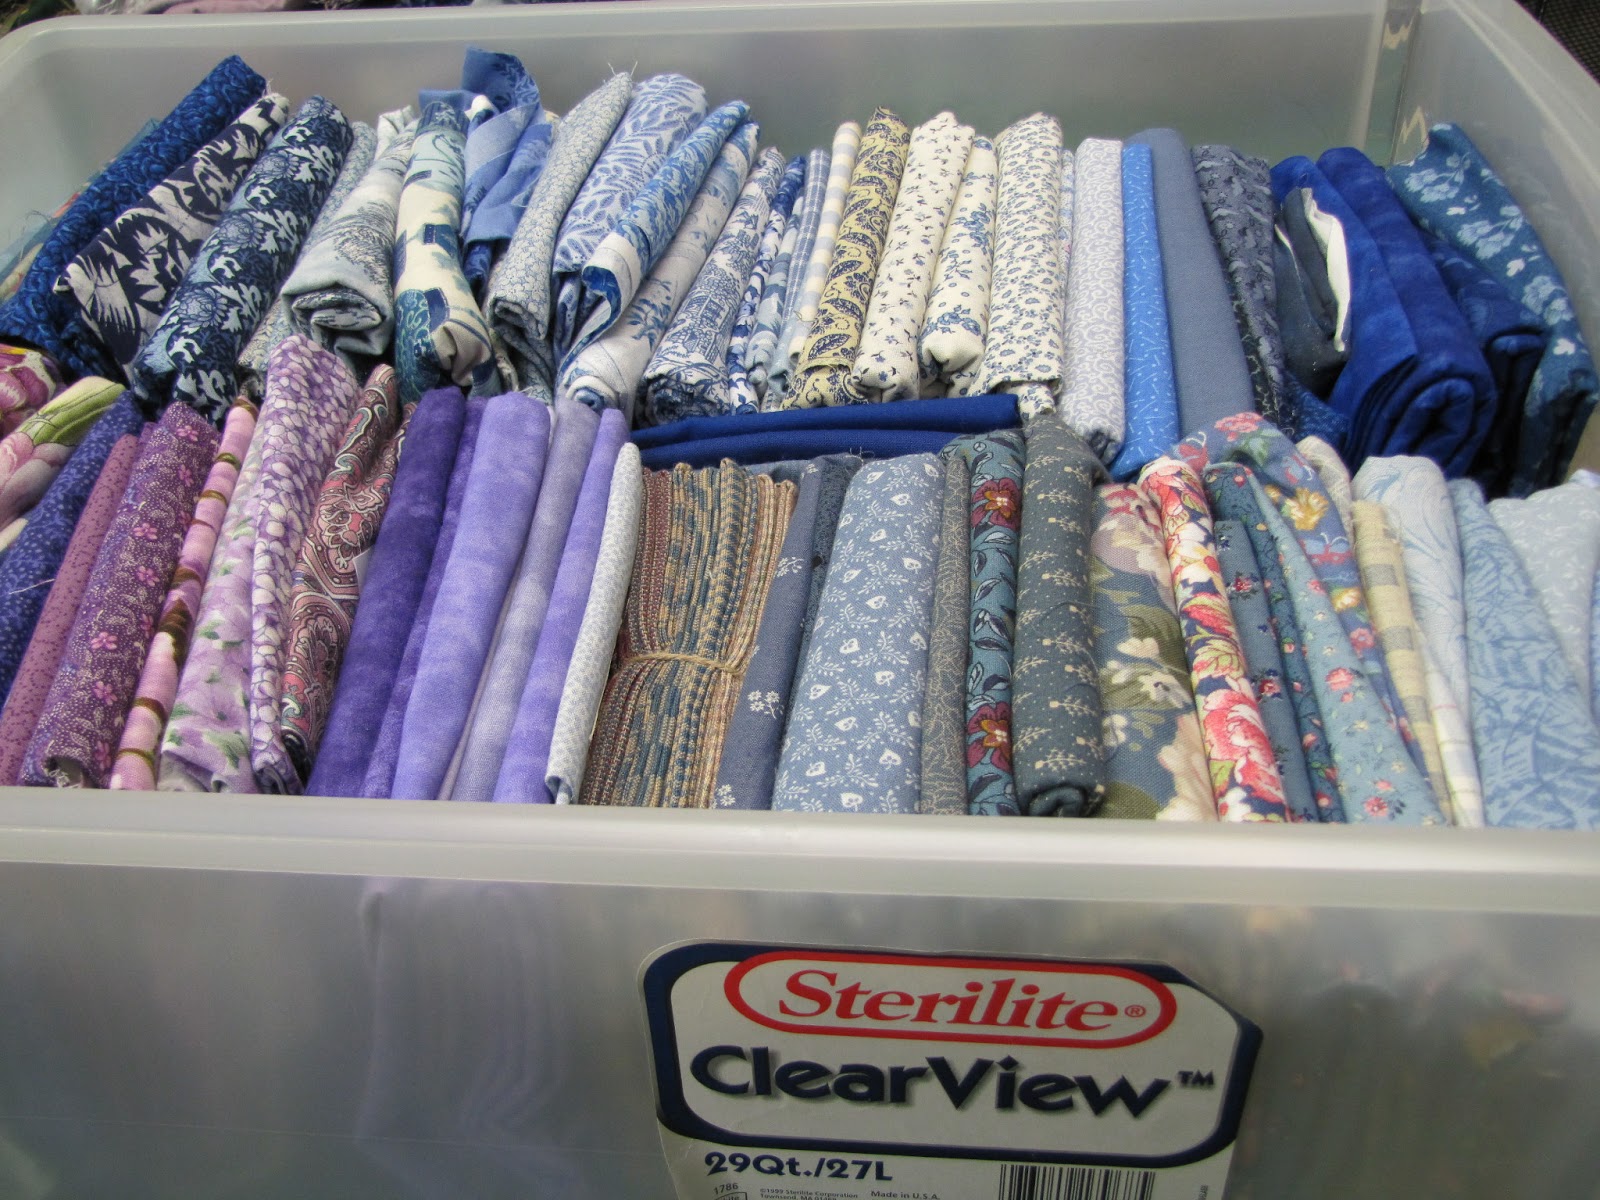
You’re not supposed to store fabric in plastic because it can’t
breathe, but stashed in the drawers, the fabric is protected from my cats who
love fabric almost as much as I do. I
try to rifle through my stash often enough that there’s some” fabric breathing”
going on.

When
Pacific Fabrics still had a store in Puyallup, I got hooked on their baby
bolts. They cut the cardboard forms that fabric is wrapped around in half. Then
they folded fabric (usually less than a yard) in half lengthwise, wrapped it
around the half size cardboard, and called them baby bolts. They are so cute,
they’re irresistible. My collection grew over the years. I tucked my baby bolt
collection into the cradle that my daughter slept in as an infant.
 |
| Cradle full of baby bolts. |
If a
piece of fabric is two yards or longer, I wrap it onto a cardboard bolt that I
ask fabric stores for when they’re done with them. These are the fabrics that I’ll use for quilt
backings or borders. I plan to eventually clear a bookshelf to store them
upright, like fabric stores do.
Many
quilters store their threads on wall racks, but my wall space is limited, and
my cats are curious, so I keep my spools of thread stored in a small
three-drawer cabinet. One drawer is for
multi-purpose thread. One is for 100% cotton quilting thread, and the third
drawer is for specialty threads like metallics.
One of the walls of my open
sewing area is a design wall. Initially I hung a very long wooden curtain rod
on the wall and hung a queen-sized flannel sheet from it. Quilt pieces are
supposed to cling to the flannel as you play with them and rearrange them.
However, my design wall is along the pathway to the garage, and anytime someone
walked by it, pieces fluttered to the floor. I started pinning them to the
flannel. It slowed creativity down.
 |
| My design wall with Kaffe Fassett quilt in-progress. |
Then I read somewhere about wrapping a 4’ x 8’
piece of polystyrene foam board with flannel.
This called for a trip to the hardware store. Johnny duct taped two of the boards together,
and slid them behind the flannel sheet and under the curtain rod. Other people
wrap the foam board in flannel and attach it to the wall, but since I already
had the curtain rod up, my method was easier. The curtain rod keeps the foam
board from falling down. Now I just smooth quilt pieces onto the flannel and
stick pins through them into the foam board like a bulletin board.
My books are organized by
specialized types of quilting (applique, paper piecing, traditional blocks,
etc.), and alphabetically by author. I have a master list of them that I try to
keep current. I started the list when my library grew big enough that I couldn’t
remember what I had and bought the same book twice. I’d like to say that
they’re all neatly stored on shelves, and most of them are, but there are also
a lot of stacks of books wherever I can wedge one in.

Inspired by the Winter 2012
issue of Studios magazine and looking
at people’s studio ideas on Pinterest, I got busy reorganizing and tidying up
my studio—again. I decided to clear away the calendar and artwork that I had on
the wall behind my ironing center and dedicate it to storing tools instead.
John put up a pegboard that now holds my rulers, and templates. That freed up
room around my light table making it easier to find what I need quickly.
 |
| John putting the pegboard up! |

Standing back, I took in my
spruced up sewing area and thought it needed a little something extra, so I
made a sign to hang at the top of the pegboard.
I painted wooden letters “SEW” turquoise and glued them onto a scrap of
white bead board. It’s
the perfect touch!
 |
| Pegboard fully loaded and the finished "SEW" sign. |
There’s still a lot of work to
be done, sorting and reducing, and re-vamping the TV/stereo system, but the cutting
table is cleared off and the structure of the room is in place. I’m probably
three fourths of the way through, and my sewing area is turning into a real
studio!

Laura Keolanui
Stark is still working on organizing her studio, and trying very hard not to
start working on any of the projects she unearthed until the “remodeling” is
complete. She can be reached at stark.laura.k@gmail.com. Good sources of organization ideas are in
the books: Creating Your Perfect Quilting Space Sewing-Room Makeovers for
any space and any budget, by Lois L. Hallock, and Organizing Your Craft
Space, by Jo Packham.
