Sometimes sweet . . . Sometimes tart . . . Always a slice of life.

Saturday, March 23, 2013

Wishful Thinking at the 2013 Sewing & Stitchery Expo


This year I showed up at the Sewing and Stitchery Expo in Puyallup prepared to look, but not buy. Well, at least not buy a lot. I had organized my sewing studio and knew exactly how much and what kinds of fabrics I already have, which books I have, and which templates and rulers are hanging on my wall. After sorting through it all, I knew that I didn’t NEED much of anything.

     I signed up for a lot of seminars, six over two days which quickly expanded to fourteen seminars over all four days, starting off with one called The Benefits of Longarm Quilting and ending with The Etsy Seller’s Handbook. That would mean a lot of time for learning and not much time for shopping.  It was unrealistic to think that I wouldn’t buy anything, but I was counting on being able to limit it to just a few sewing notions or a book linked to a couple of the classes I was taking.

         My two quilting friends, Margie and Carol, and I call ourselves the Chatterbox Chicks. We get together each year at the Sewing and Stitchery Expo to take seminars and compare what we’ve learned and which quilting supplies we’ve bought. 
The Chatterbox Chicks: Carol, Margie, and Laura.
Another friend, Adelle, usually meets us on one of the days near the center stage where we eat our sack lunches and catch up.

        The only time we could all meet was on Thursday. After my seminar on Making Resin Buttons, Embellishments & Closures, I made my way over to the center stage. We managed to commandeer a bench and all crammed onto it. We compared notes on our classes and did a little show and tell. Margie showed us a computer case that she’d stitched up in one of her classes. Carol shared the beginning of a fusible wall hanging. 
 Adelle gave us each a dish cloth that she knitted. 
I showed them a seahorse made of stamped, ironed Angelina fibers. 
         We caught up on what everybody had been up to and then went our separate ways.

         On Friday I was still doing well on my minimal spending diet. I had bought a few things at the “seahorse booth,” some patterns from Eleanor Burns, and a few fat quarters of fabric, but that was it. 
          During a gap between seminars on Fearless Fabric Painting and Home Décor Sewing for Rookies, I walked over to the Pavilion to see what was over there.  At the end of one of the rows, I saw a TinLizzie Sitdown Model long arm quilting machine.

          A traditional full-size longarm machine has three long rollers that each of the three layers of the quilt are rolled onto. The rollers are long enough to handle the width of a king size quilt. The quilter usually stands holding the machine handles near the needle and moves the sewing machine over the quilt. The quilt remains stationary until you wind the rollers.

          The advantage of the longer arm is that it allows you to easily quilt on a wider area of the quilt. The longarm sewing machine has an arm that can range from 18 - 30" 
long. In comparison, my home sewing machine’s arm is 7" long.  

When you roll up three layers of a queen size quilt and try to squeeze it in through that 7” and then move it around smoothly to quilt, it is not exactly fun and relaxing. It’s hard to be creative when you’re wrestling with a quilt.

          However, at $7100 to $31,500, the price tag on longarms has always made me balk. Every year at the Sewing Expo I’ve looked longingly at them, but I’ve never seriously considered owning one.  Instead, I rent time on one at a Tacoma quilt shop.

         In the past, I’d seen sit-down long arm machines and kept walking. I assumed they were also out of my price range, and I was used to sewing on the big long arms. These machines don’t have the roller set-up of traditional long arms. Instead, the machine is set into a table, like a regular sewing machine. The three quilt layers are basted together and although the arm on the machine is longer, you still have to move the fabric under the needle. That didn’t seem like it would solve anything.  Wasn’t that like quilting on my home machine?

        Yet here I was, standing in front of a TinLizzie with a friendly saleswoman urging me to sit down and try it. I had some time before my next seminar. What could it hurt? I was sure it wouldn’t be as smooth as the full-size long arms I was used to, but I parked my purse and tote bag near my feet, had a seat, and started quilting pebbles on the quilt sandwich sample she had on the machine. 

         What a surprise! I could easily move the quilt under my fingertips. The longarm made all the difference even though the quilt wasn’t on rollers. My stitches weren’t perfect, but I could see that they would be with just a little more practice.

         Adjusting the stitch speed was as simple as reaching up and turning a knob to point to a turtle, a bunny or any speed in between. The saleswoman pointed out other features on the machine, like a built-in bobbin winder that winds while you quilt, and a flexible lamp that could shine light right where you needed it. I liked that the table had an extra hinged leaf that almost doubled the workspace when it was raised.  And, if I wanted to eventually upgrade to a frame with the three rollers, that was possible.

          So I asked her the million dollar question, “How much is it?” She answered, “It’s usually $5199, but there is a special during the Sew Expo: $3999.” I asked if there was anyway they’d go lower. She said her manager might be willing to sell the floor model for less. I took a flier and told her I’d think about it. It was definitely more affordable than the full size longarms, but I wasn’t in the market for a long arm.       

        In the meantime, Carol had been test driving sewing machines. When I met up with her after my Quick Gifts from Your Scrap Stash seminar, I asked her to show me the sewing machine she was considering. On the way, I told her I’d checked out a TinLizzie Sitdown Model. 
          Her saleswoman had helped her narrow down that she didn’t want a new sewing/embroidery machine, she wanted a machine that she could easily quilt on.  So she steered Carol to their sit down quilting machine, The HQ Sweet Sixteen,  which was comparable to the TinLizzie. Carol told me she tried their machine and was comfortable with it, but not locked in. I quilted on it for a few minutes and then we left.

        I filled Carol in about the TinLizzie and added that after “driving” both, I liked the TinLizzie better. It seemed smoother to me, it’s arm was 18” compared to 16” on the Sweet Sixteen. The TinLizzie was less expensive, and the extra leaf on the table increased the work area so a larger quilt would be easier to manipulate. We walked over to the Pavilion so she could try it and see what she thought.

         When we got to the Quality Sewing & Vacuum booth, the woman I had talked to wasn’t there. Instead, a salesman greeted us joking, “How many do you want to buy today?” Carol sat down and started quilting and asking questions.  We circled the machine, “kicking the tires.” Well, more like looking under the hood, I mean, under the table to see how much work it would take to set up.

        Then Carol played off of his initial question and asked him if he’d give us a better deal if we bought two. He lit up like a Christmas tree and said he definitely would, but he’d have to talk to his manager. He didn’t want to do that until we were sure we were going to buy two.

         The expo was wrapping up for the day, Carol took a flier and we told him we’d check back with him. As soon as we turned a corner out of his sight, Carol and I looked at each other with devilish smiles on our faces and started giggling. What the heck were we doing? I hadn’t even known  I was in the market for a longarm! We started scheming. How low would the salesman go? What would our husbands say? Each of us was calculating in our heads how much we’d made or were going to make at our part time jobs.  True to our Chatterbox Chicks name, we chattered through buying scones in the rain on our way to the gates of the fairgrounds. 

         Then I ramped it up even further. What about Margie? Would Margie want in? This could potentially be the best deal in Chatterbox Chick history! Would he drop the price even further if we bought three machines? Our smiles got even more wicked. We paused under the shelter of the Blue Gate to text Margie.  
         We waited for her answer. Margie said she didn’t think she could do it. She had recently  bought a stitch regulator for her sewing machine.

         On the walk to the parking lot, Carol and I plotted how we’d talk to our hubbies, and what questions we’d ask the sales guy if we really were going to do this. Carol agreed to do the negotiating. I told her to ask her husband Michael for pointers since he works at a car dealership. We agreed to meet after my seminar, An Art Quilt Made in the Garden of Eden the next afternoon.
          I planned on softening John up by cooking him a steak and baked potatoes before bringing up the subject, but when I got home he said he’d already eaten dinner. I offered him a scone instead and dove in. I was prepared to tell him all the benefits of this machine and how little space it would take up compared to a full size longarm. I was going to remind him that I had bought my sewing machine 14 years ago and hadn’t bought any major quilting equipment since then.

         Before I could start my planned sales pitch, he cut right to the bottom line. “How much is it?” So much for the informational part of my presentation.  I told him the regular price: $5199. Then I told him the special Sew Expo price: $3999, and slid into the story about how Carol and I could get a two machine discount.

         He immediately replied, “Oh yeah. You need to go for this,” and started to look up prices online so we’d know how much leverage we had.  He coached me on how he thought we should play it during the negotiations.

         I looked out over my backyard and across the fence to the lights in Carol’s house and wondered how her talk with Michael was going. I texted her that I’d gotten the green light.

         The next day Carol and I met after my seminar. Michael had given her the go-ahead and given her tips on how to handle the negotiations. We went over the questions we’d ask, how high we were willing to go, what our initial offer would be, and what points we thought we’d be able to bargain about. Carol had scoped out that the sales guy we had talked to was there.
         We hovered near the booth until some other women left.  Carol asked the salesman if he remembered us. He did. We asked all our questions and he gave us all the right answers. Then Carol asked him what kind of deal he could give us if we each bought one.  He went and got the manager. We held our breath.

         The manager gave us a price. Carol asked if he could throw in some accessories. He agreed. Then she asked him if he’d pay the sales tax since we weren’t going to use their financing. He got his calculator out and then said yes. I told him that we’d walk and talk, and get back to him.
         Once again Carol and I turned the corner and then let grins take over our faces. He had come within $100 of the outrageous price we’d thought of offering him. We talked it over and decided not to counteroffer, to just take what he’d offered: $3100! That was a 40% discount with some extras thrown in. We could take free classes to learn how to use it, and they’d assemble it for us at the store, so we’d just have to load it into our cars.

         The only bad part of the deal was that they were sold out of our machines. They had to be back ordered. We’d have to wait until next month to start quilting on our very own TinLizzies. Oh well, it would give us time to rearrange our sewing studios.  
         I hadn’t done a very good job on keeping my spending down. This is by far the most I’d ever spent at the Sewing & Stitchery Expo. I hadn’t planned on buying a long arm machine. But how could I pass this deal up?
       As the manager wrote up our orders, a text from Margie came in, “You guys are scary when u get together!  Lol!” I texted back that we’d sealed the deal and were signing the paperwork. Her text flew back, “OMG!  A dream come true!” She sure is right about that!


Laura Keolanui Stark is still pinching herself to make sure she really is the proud new owner of a longarm quilting machine.  She can be reached at stark.laura.k@gmail.com.             


Tuesday, February 19, 2013

Sew On!


                My sewing area/sweatshop is consistent with my quilt creation style---an ongoing work in progress.  

          When I first set foot in this house and walked into what was then a stained glass studio, I was beside myself. The wheels in my head spun into overdrive! I had just started quilting. If we bought this house, I wouldn’t have to sew on the dining room table, I could leave my sewing machine set up permanently! 
          There would be room for fabric! The counters were built-in in a U shape, with drawers.  There was even a built in light table! And, the area was far away from the bedrooms. I could sew late into the night without waking up the whole house.

        We bought the house and I started filling my sewing area with quilting books, tools, and mountains of fabric. It wasn’t long before it was obvious that I had to get a handle on organization or risk getting buried under an avalanche of fabric.

I took measurements and fit three-drawer bins under the counters to hold fabric. I followed advice from the book Organizing Solutions for Every Quilter and wrapped my fabric around my 6 x 24” ruler so that it would all be uniformly folded.   
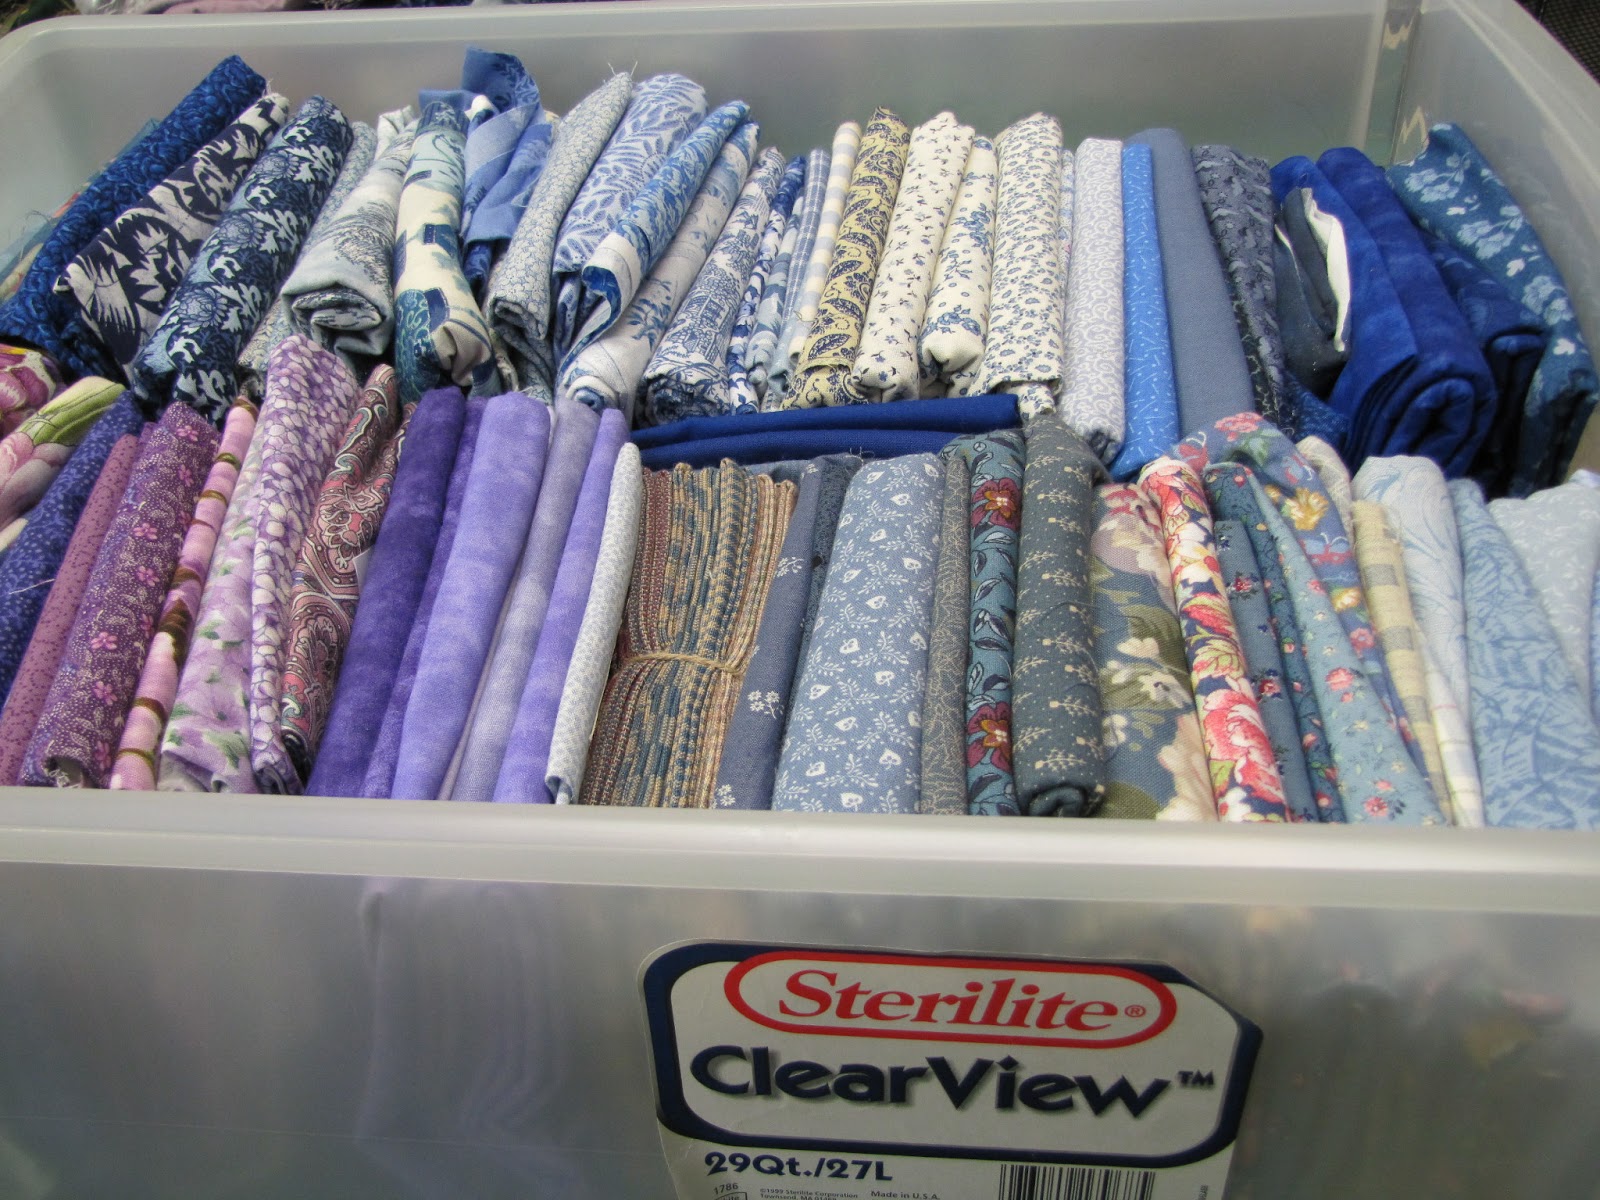
Then I loaded the drawers mostly by color and a few other separate categories (like Christmas fabric, fall prints, 30s/40s reproductions, novelty fabrics and batiks). It’s good that the plastic drawers are semi- transparent because then I can see the colors in each one. 
You’re not supposed to  store fabric in plastic because it can’t breathe, but stashed in the drawers, the fabric is protected from my cats who love fabric almost as much as I do.  I try to rifle through my stash often enough that there’s some” fabric breathing” going on.

       When Pacific Fabrics still had a store in Puyallup, I got hooked on their baby bolts. They cut the cardboard forms that fabric is wrapped around in half. Then they folded fabric (usually less than a yard) in half lengthwise, wrapped it around the half size cardboard, and called them baby bolts. They are so cute, they’re irresistible. My collection grew over the years. I tucked my baby bolt collection into the cradle that my daughter slept in as an infant.

Cradle full of baby bolts.
        If a piece of fabric is two yards or longer, I wrap it onto a cardboard bolt that I ask fabric stores for when they’re done with them.  These are the fabrics that I’ll use for quilt backings or borders. I plan to eventually clear a bookshelf to store them upright, like fabric stores do.

       Many quilters store their threads on wall racks, but my wall space is limited, and my cats are curious, so I keep my spools of thread stored in a small three-drawer cabinet.  One drawer is for multi-purpose thread. One is for 100% cotton quilting thread, and the third drawer is for specialty threads like metallics.

One of the walls of my open sewing area is a design wall. Initially I hung a very long wooden curtain rod on the wall and hung a queen-sized flannel sheet from it. Quilt pieces are supposed to cling to the flannel as you play with them and rearrange them. However, my design wall is along the pathway to the garage, and anytime someone walked by it, pieces fluttered to the floor. I started pinning them to the flannel. It slowed creativity down.

My design wall with Kaffe Fassett quilt in-progress.
 Then I read somewhere about wrapping a 4’ x 8’ piece of polystyrene foam board with flannel.  This called for a trip to the hardware store.  Johnny duct taped two of the boards together, and slid them behind the flannel sheet and under the curtain rod. Other people wrap the foam board in flannel and attach it to the wall, but since I already had the curtain rod up, my method was easier. The curtain rod keeps the foam board from falling down. Now I just smooth quilt pieces onto the flannel and stick pins through them into the foam board like a bulletin board.

My books are organized by specialized types of quilting (applique, paper piecing, traditional blocks, etc.), and alphabetically by author. I have a master list of them that I try to keep current. I started the list when my library grew big enough that I couldn’t remember what I had and bought the same book twice. I’d like to say that they’re all neatly stored on shelves, and most of them are, but there are also a lot of stacks of books wherever I can wedge one in.

Inspired by the Winter 2012 issue of Studios magazine and looking at people’s studio ideas on Pinterest, I got busy reorganizing and tidying up my studio—again. I decided to clear away the calendar and artwork that I had on the wall behind my ironing center and dedicate it to storing tools instead. John put up a pegboard that now holds my rulers, and templates. That freed up room around my light table making it easier to find what I need quickly.

John putting the pegboard up!
Standing back, I took in my spruced up sewing area and thought it needed a little something extra, so I made a sign to hang at the top of the pegboard.  I painted wooden letters “SEW” turquoise and glued them onto a scrap of white bead board. It’s the perfect touch!

Pegboard fully loaded and the finished "SEW" sign.
There’s still a lot of work to be done, sorting and reducing, and re-vamping the TV/stereo system, but the cutting table is cleared off and the structure of the room is in place. I’m probably three fourths of the way through, and my sewing area is turning into a real studio!


Laura Keolanui Stark is still working on organizing her studio, and trying very hard not to start working on any of the projects she unearthed until the “remodeling” is complete. She can be reached at stark.laura.k@gmail.com. Good sources of organization ideas are in the books: Creating Your Perfect Quilting Space Sewing-Room Makeovers for any space and any budget, by Lois L. Hallock, and Organizing Your Craft Space, by Jo Packham.


Monday, February 18, 2013

Tonight is the night that Crockett's Public House and the Starks make their debut on Diner's Drive-Ins and Dives! Tune into the Food Network at 7:00 and 10:00 Pacific Time, Season16/episode 8, Decadent Dishes, and watch us enjoy Fire Grilled Artichokes, Mom's Sloppy Joe, and Public House Meatballs with Guy Fieri!

If you'd like to read about what happened behind the scenes of the filming in Crockett's, read my blog posted on 11-3-2012.

Laura Stark will be watching the show in Crockett's located in beautiful downtown Puyallup. She can be reached at stark.laura.k@gmail.com.

Wednesday, January 23, 2013

Cure for the Common Cold


       It’s cold and flu season and everybody has their own reaction to being sick. Some people try to power through it by ignoring their symptoms. They are a virus’s best friend, spreading the bug through offices and schools, wherever they go while they’re in denial.

        Some people in my family view sickness as a personal affront. How could their bodies betray them with a virus? Being sick is a sign of weakness.

        Women often say that men are the biggest babies when they get sick. They demand constant care and attention. I think that’s probably because the mom of the family is expected to take care of everyone no matter what, but if the dad can get off of work, he expects to be cared for.

         Some people are whiners, complaining through stuffed up noses about their misery, beyond childhood days.

         Then there are the wimps, like me. I don’t fight it at all.  I don’t whine, I just go right down for the count. That’s exactly what I did two weeks ago.  For a day, my throat hurt and I had the sniffles. I thought maybe it was just allergies. But the next day it was obvious that I had a cold.

         Part one of my “Oh man, I’m sick” strategy is to stop the sickness from spreading. I kicked John out of our bedroom and isolated myself under mountains of covers. In the middle of the night I got up and went through the house with Clorox wipes.  I wiped down the refrigerator door, the microwave, the TV remotes, telephone, the light switches, door knobs, banister, and anything else I thought I’d touched. I walked through rooms, spraying Lysol in the air and then retreated to my bed.

For the next couple of days John and Johnny would come in to check on me when they got home from work and I’d shoo them away.  Sarah kept tabs on me via phone from WSU after she called the first morning and thought she had a wrong number because my voice was unrecognizable.

Part two of my sickness plan is to get better as fast as I can, that’s why I surrender immediately. On my house sanitizing mission, I’d mixed up a glass of Airborne and drank that down. (A friend swears by Zicam, another recommends Cold-Eze.) I spent the next two days in bed surrounded by tissue boxes, watching remodeling and real estate shows on HGTV, reading old magazines, and eating Campbell’s Soup on the Go from our pantry. 
For dinner, John got take-out Pho for us and when the cook heard that I had a cold, he threw in some extra hot sauce for me. Everybody has their personal cold remedies.

My trusty laptop was with me in the sick bed, so I looked up information like how to tell the difference between the flu and a cold. I didn’t have a fever or muscle aches, and it came on gradually, so this was probably a cold. I’d had a pneumonia shot a few years ago, so I didn’t have to worry about it turning into something more serious.

I logged into Pinterest and looked up cold remedies. Several people mentioned a tea recipe. It sounded good, I was drinking tea anyway, and I knew I had the ingredients. It didn’t instantly cure me, but maybe it shortened the duration of the cold, and it tasted good. Here’s the recipe, from prettylittlepantry.blogspot.com:


Ingredients:

1 Cup of Tazo Orange Blossom Tea

1 Tsp Honey

1/2 Tsp Cinnamon

1/2 Tsp Ginger

Dash of Cayenne Pepper (Optional)


Brew the Tazo tea as you normally would. 


Once the tea has brewed for about a minute or two add the Tsp of Honey, the 1/4 tsp Cinnamon, the 1/4 tsp Ginger, and the dash of Cayenne if you are really congested. Stir and enjoy. 


I used Tazo Wild Sweet Orange tea, which I mistakenly thought was the same as the Orange Blossom tea, and it still tasted delicious, but maybe I would have gotten better faster if I’d used the right tea. Either way, lots of fluids are good when you’re sick.


I only went out once while I was still miserable—to get more tissue when I exhausted my stockpile from Costco. I dashed into the store in the middle of the day, when most people are at work, and I splurged on the expensive name brand, with lotion tissue. After going through six boxes of what now felt like sandpaper tissue, I figured I’d earned the good stuff. I also grabbed a tube of Nivea Milk and Honey lip balm (Sarah’s recommendation), then made my way back to my cocoon.

After two days in bed, contemplating life’s big questions like: why don’t dogs and cats get colds? I began to feel more human. The head cold ran its course. My throat stopped hurting. Then I switched from blowing my nose constantly to coughing. Eventually that also calmed down. 

It took a full two weeks, but I’m healthy again just in time to report to my part time job and of course, Zumba. I’ve cleared away the tissue box, teapot, and lip balm from my nightstand. Amazingly, nobody else in my house got the cold, so my germaphobic techniques were a success.


Laura Keolanui Stark is up and running again. She can be reached at stark.laura.k@gmail.com.